CMA Lab Curved Screen
Welcome to the CMA Lab Curved Screen venue.
Though not a SoundLab room, this CMA space is often used by SoundLab users and related classes and projects. Thus it became important to have a clear documentation of this space as well. Please follow these procedures strictly to protect the equipment and ensure safety.
👷 Safety First
⚠️ NOTE
Please always ask a technician for help before using any devices in the CMA Lab.
NEVER operate any equipment without a technician present.
📺 Display Connection
Start of Session:
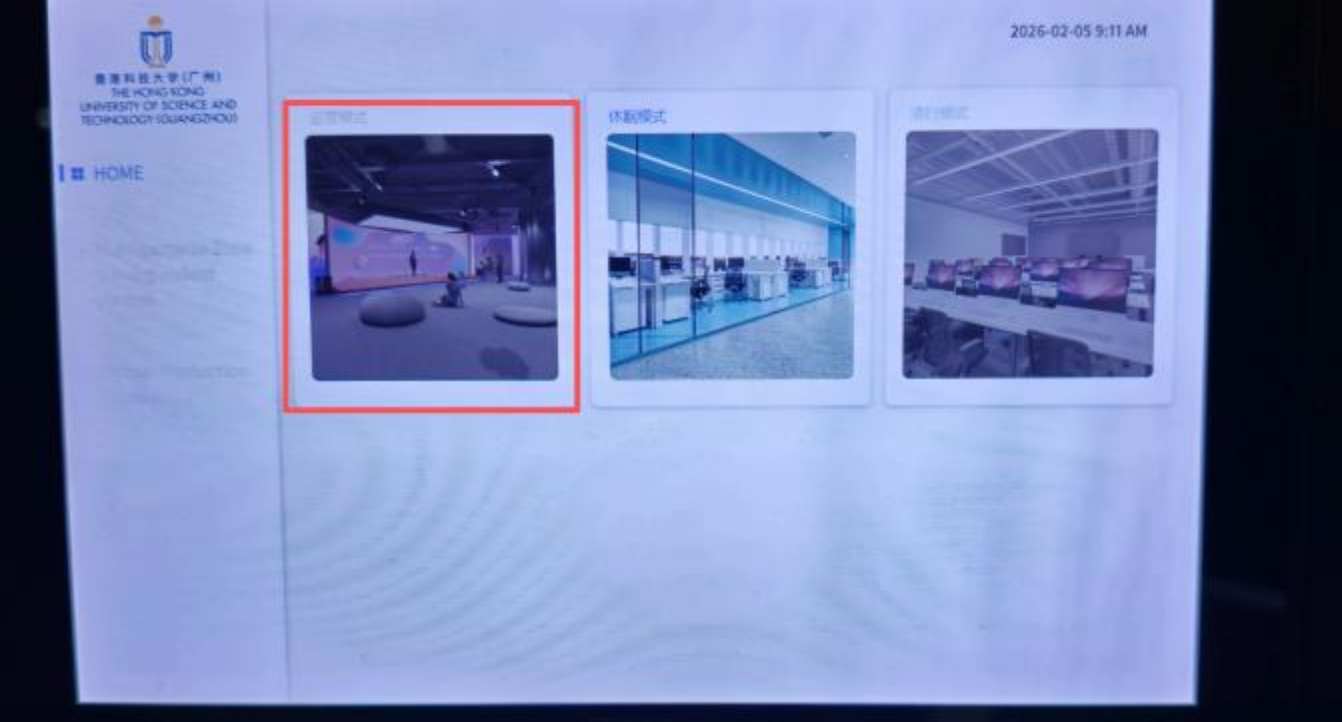
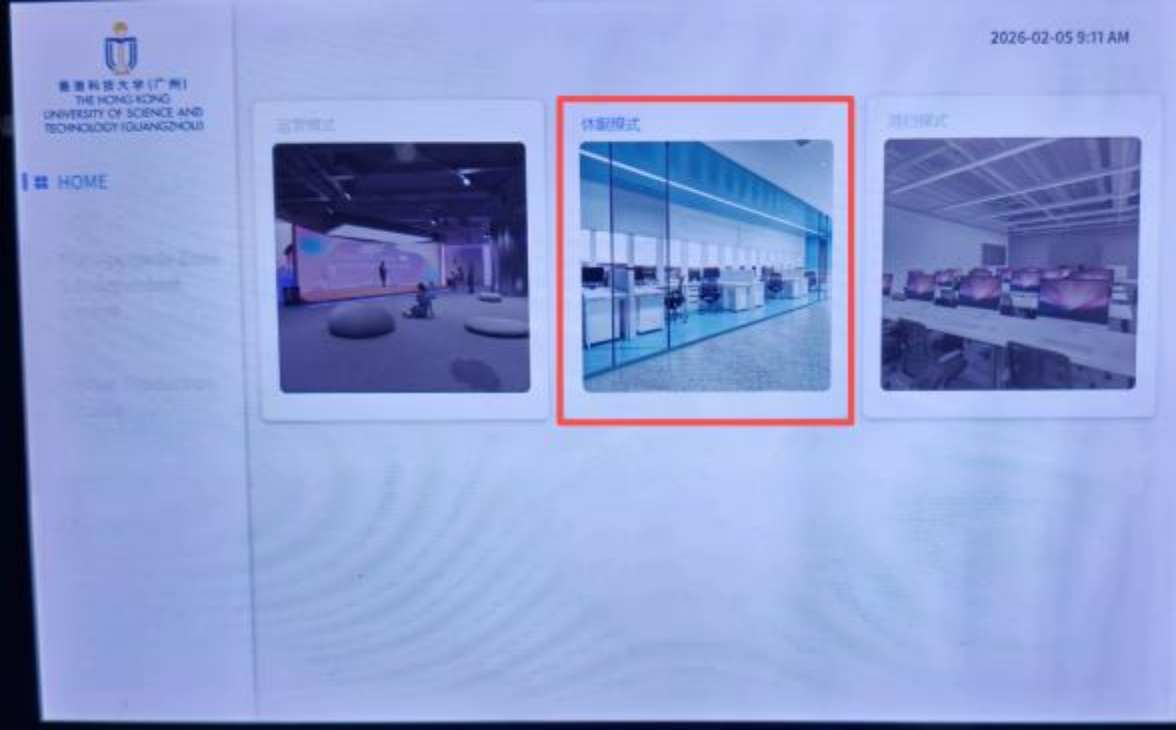
- Power On the System
Location: Main control panel at the entrance
- Press the [Operation Mode] button
- Screens will power on
- Background computer and audio system will power on simultaneously
- A brief "flash" on the screen indicates normal startup
- Choose Display Source
There are two scenarios:
1️⃣ Scenario 1: Use the Control-Area Computer (Default)
Device Location: Computer in the rear control area of the classroom
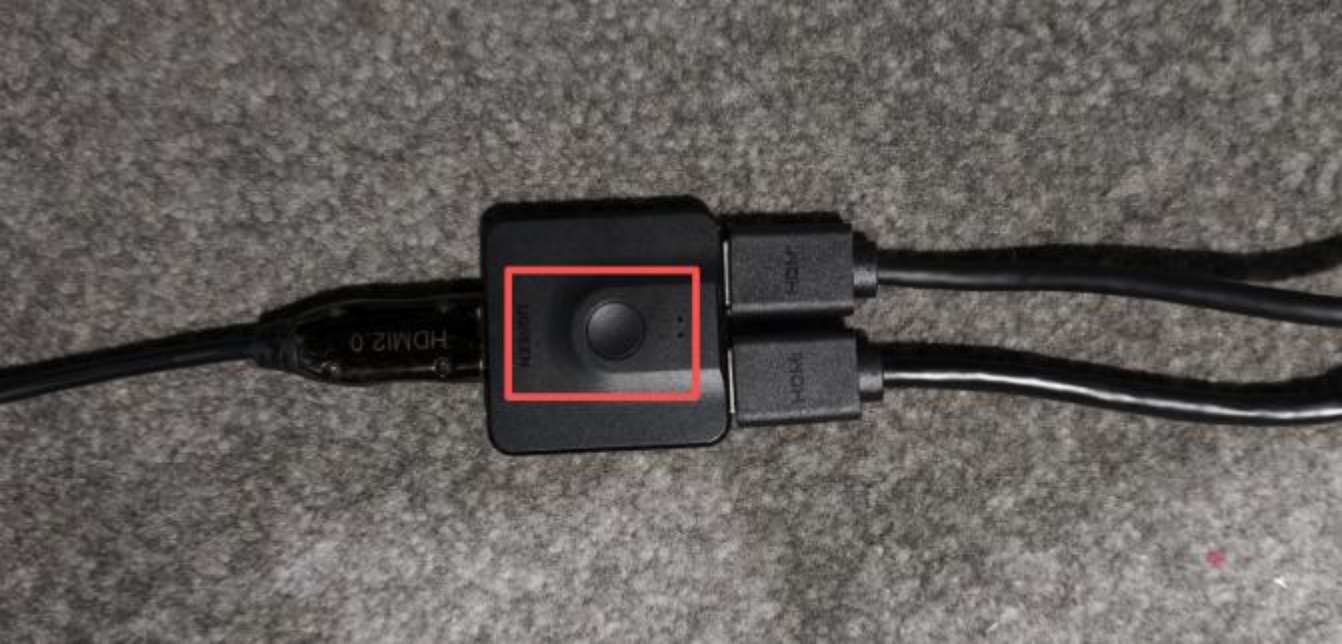
The control-area computer is connected to the curved screen via a 2-to-1 HDMI switch:
Control-area computer → 2-to-1 HDMI switch (default port) → Curved screen
- Power on the computer → image displays on the curved screen directly
- You may drag windows to the right extended screen (the curved screen acts as a right-side extended display)
2️⃣ Scenario 2: Connect Lecturer's Own Laptop (Front Stage)
Device Location: Laptop on stage.
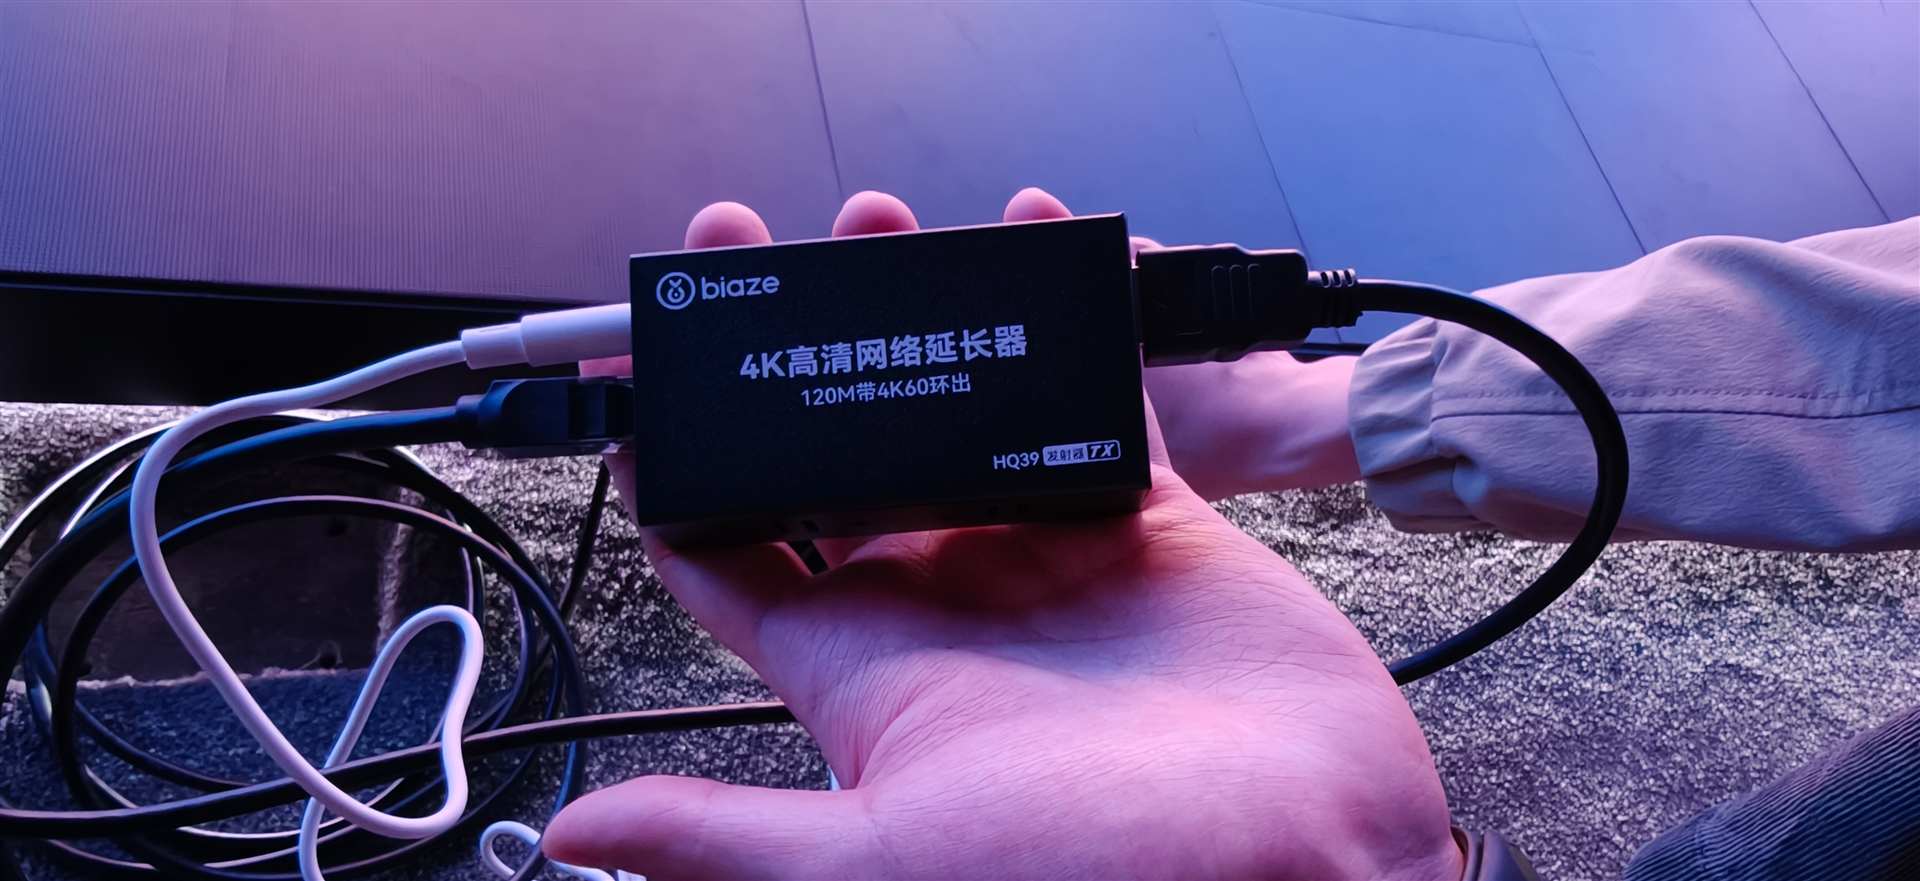
The HDMI signal is transmitted over the network to the screen:
Laptop → HDMI cable → HDMI-to-Ethernet converter → Ethernet → screen

- Locate the HDMI-to-Ethernet converter at the front stage
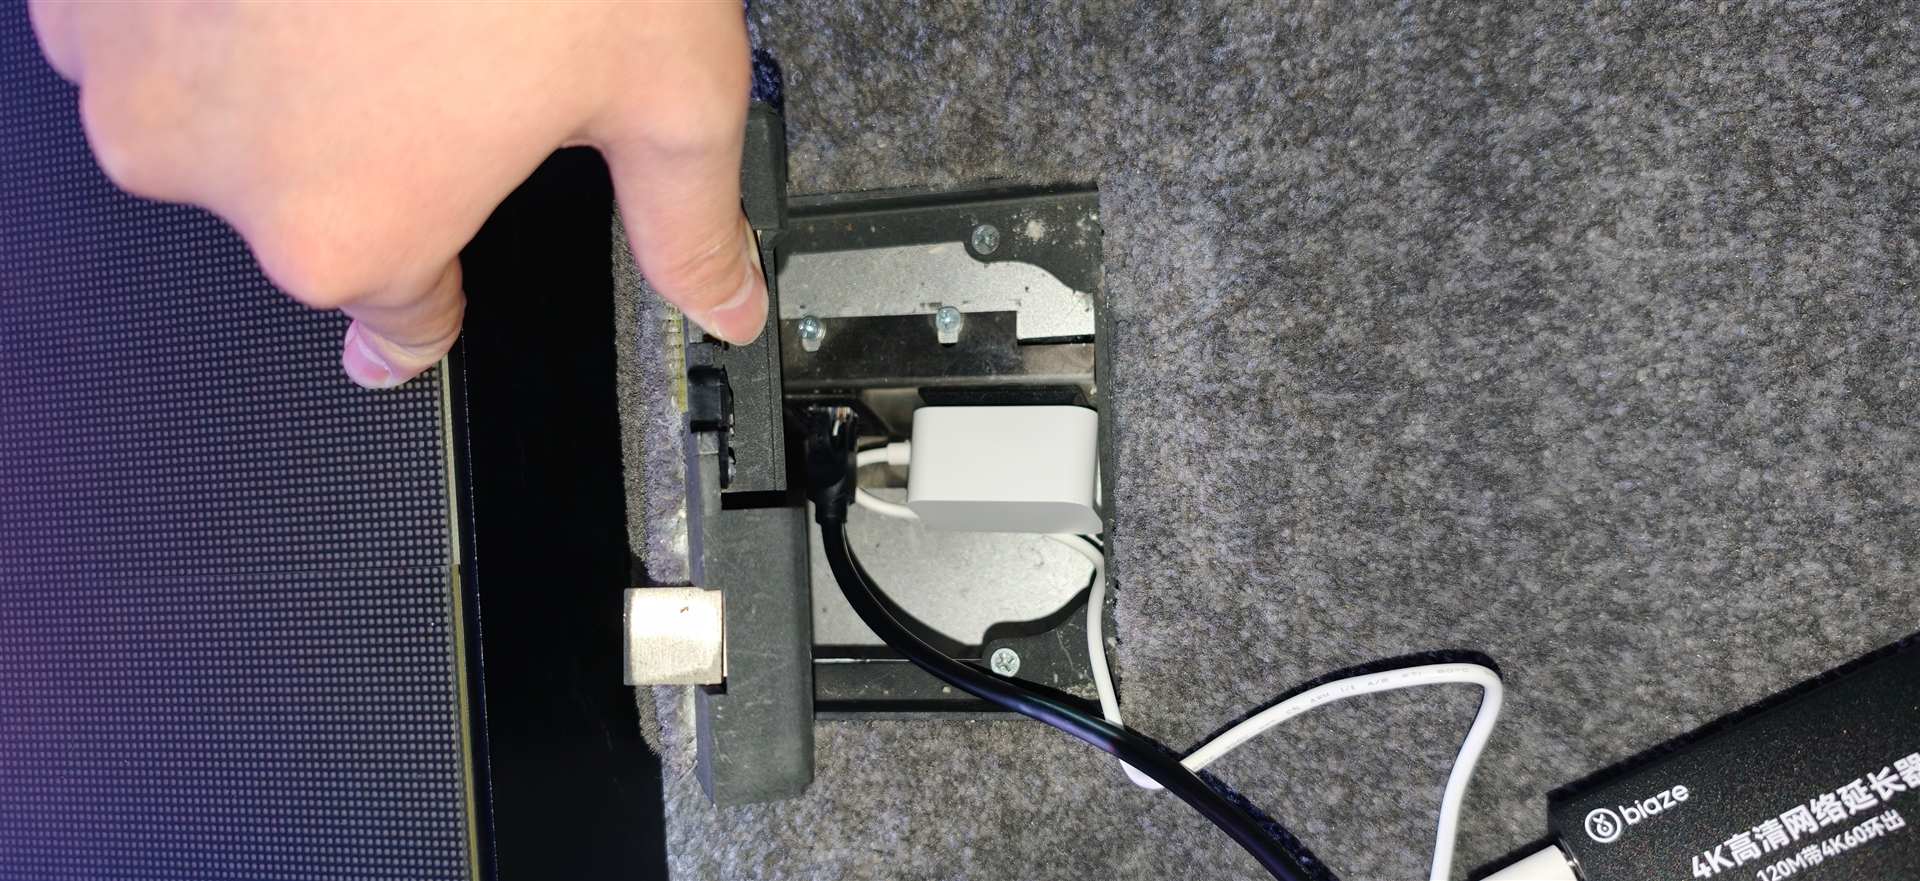
- Connect: Laptop → HDMI cable → HDMI-to-Ethernet converter
- Ensure the system is powered on → Video displays on the curved screen automatically
Display Note
The curved screen has a non-standard aspect ratio. Content from a standard laptop may have unused space or appear stretched. Consult a technician for optimal display settings if needed.
End of Session:
- Restore the HDMI setup (if a lecturer's laptop was connected at the front stage)
- Disconnect the HDMI cable from the laptop
- Reconnect to its original positions (screen side + control-area computer side)
- Make sure the 2-to-1 HDMI switch returns to the default port (control-area computer)
- Set the system back to Standby Mode on the control panel.
- Control-area computer — does not need to be shut down; simply lock the screen
🔈 Sound Connection
1️⃣ 1st Setup: HDMI as Sound output (Front Stage)
⚠️ Note
This setup requires keycard access to the server room. Contact a technician in advance to arrange this — it cannot be done independently.
This method uses a single HDMI cable to transmit both video and audio by temporarily swapping the receiving HDMI end of the existing connection in the server room.
- Connect computer on stage with HDMI cable to the HDMI-to-Ethernet converter at the front stage. (see instructions above)
- In the server room: ask the technician to temporarily swap the receiving HDMI end of the normal display connection so it takes signal from your laptop.
- On your laptop, change the audio output to HDMI. (TODO: Screenshot will come after testing what is the name of HDMI output in the venue)
Power Off:
- Disconnect the HDMI cable from the HDMI-to-Ethernet converter
- Ask the technician to restore the server room HDMI connection to its original position
2️⃣ 2nd Setup: External Audio Interface for Sound Output
IMPORTANT
Keep the STEREO Channel (Right side fader of Mixer) MUTED until the audio interface connected. 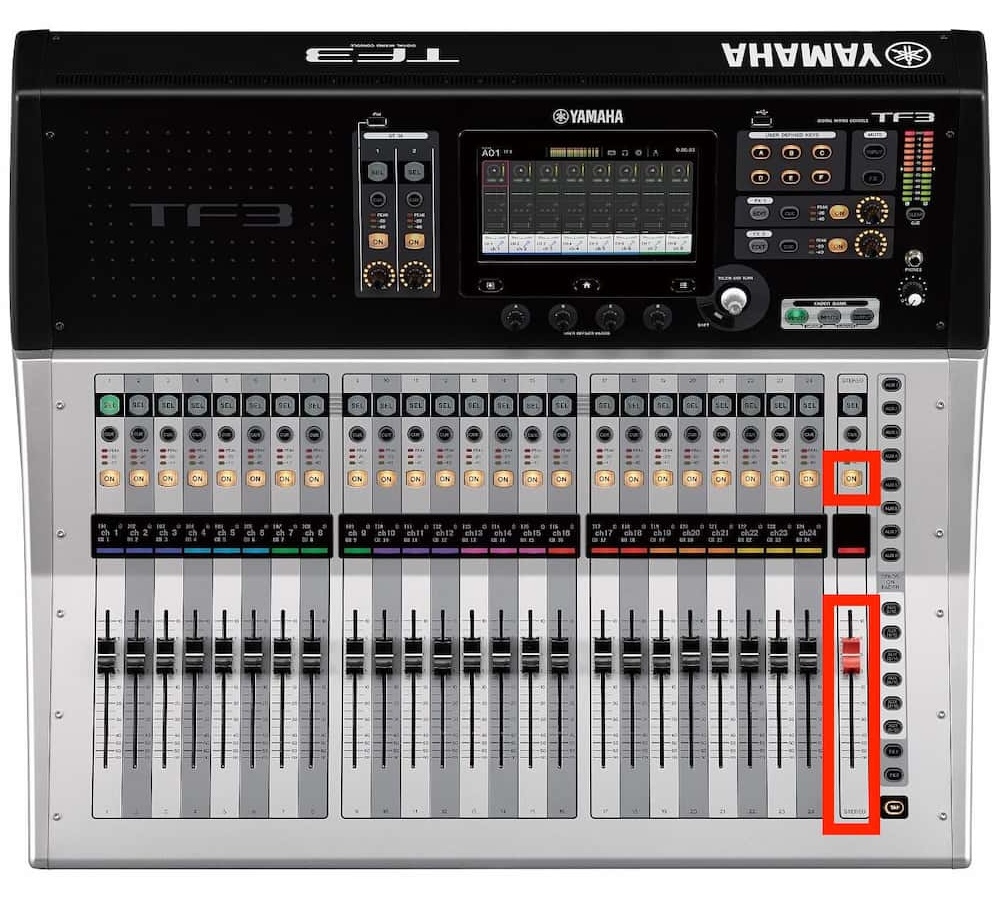
Connect Laptop to the Audio Interface.
Use proper borrow procedure to borrow audio interface from Sound Lab, OR bring your own audio interface which requires TRS/XLR output.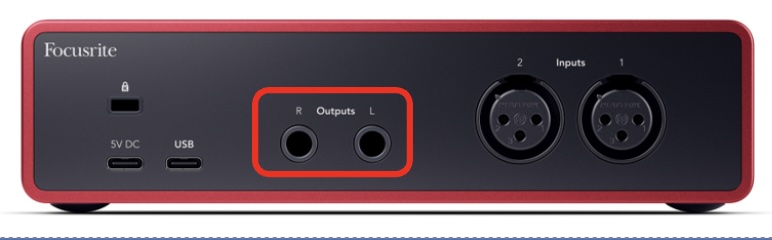
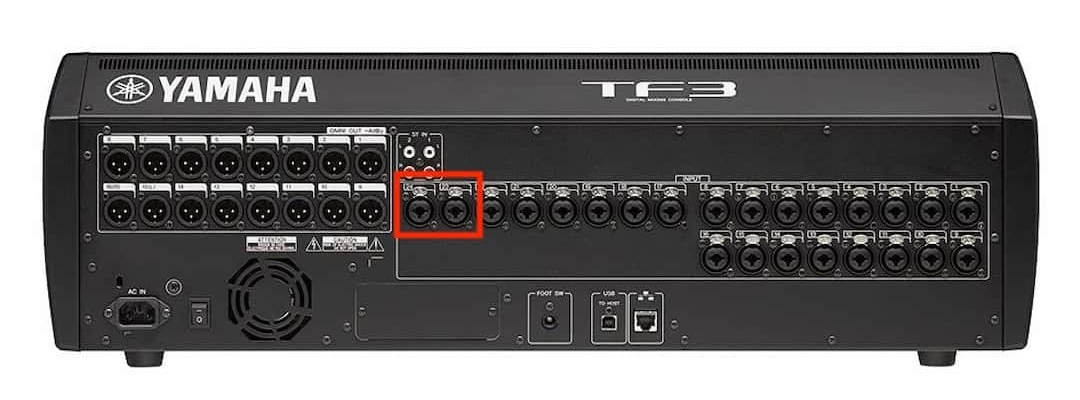
Connect Output of Audio Interface to venue's YAMAHA TF3 Mixer.
Use 2 * 6.35mm TRS to XLR connectors with 2 * 10m XLR cables.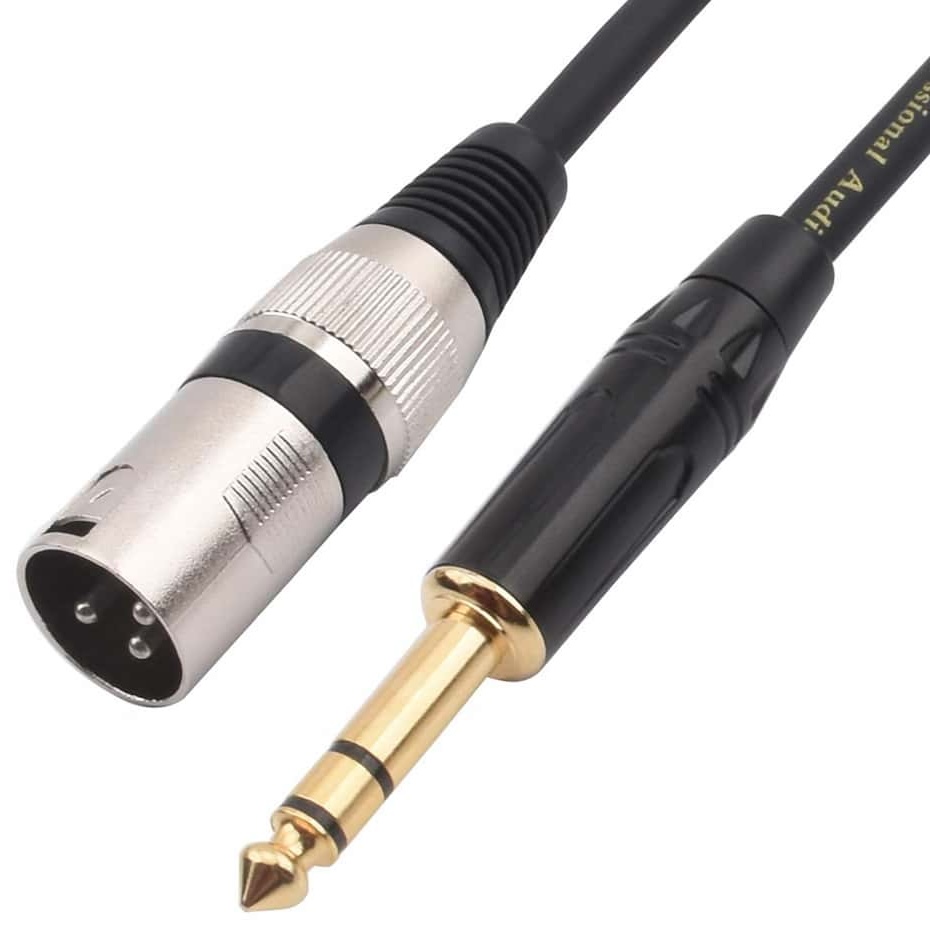
Connect output of audio interface to YAMAHA TF3 Mixer's 23(L) & 24(R) channels.
Turn UP the fader of STEREO Channel on Mixer SLOWLY.
Make sure you are at the INPUT1 section of Fader bank (top right).
Then click the SEL button of 23 & 24 channels.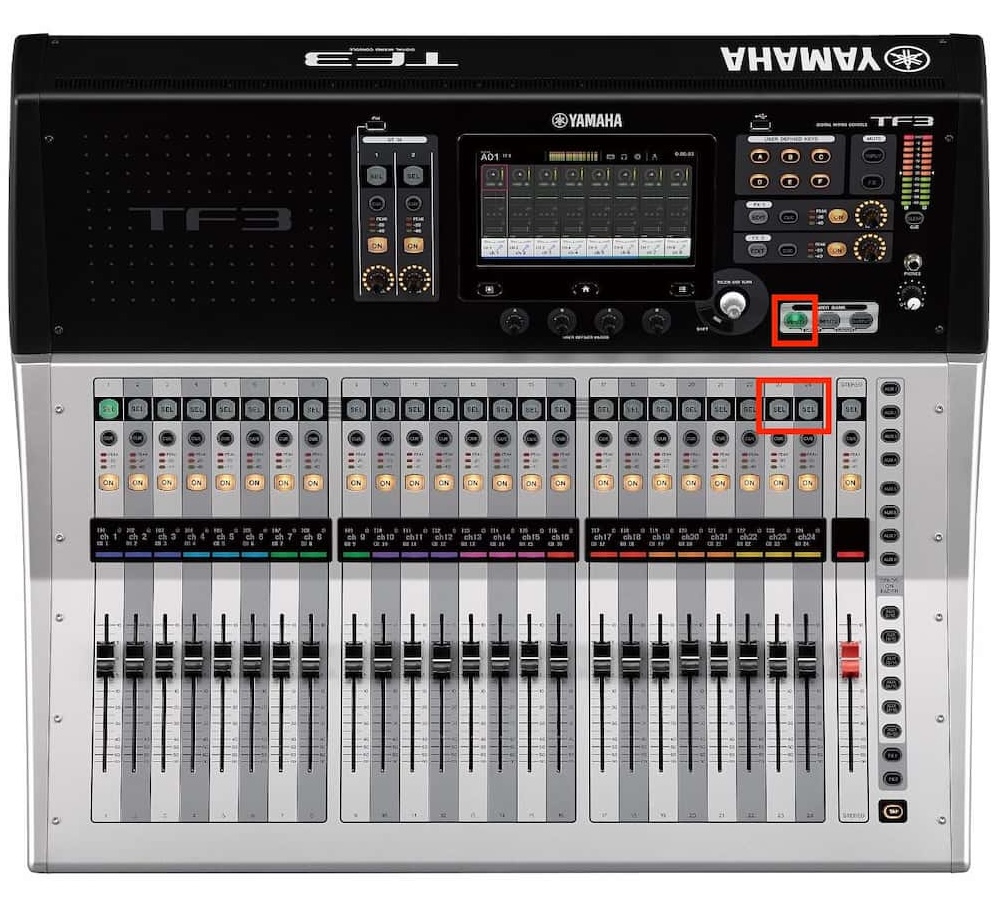
Then click the left corner of the screen to enable input gain control page.
Adjust the D.Gain fader slowly to around +12 on the screen.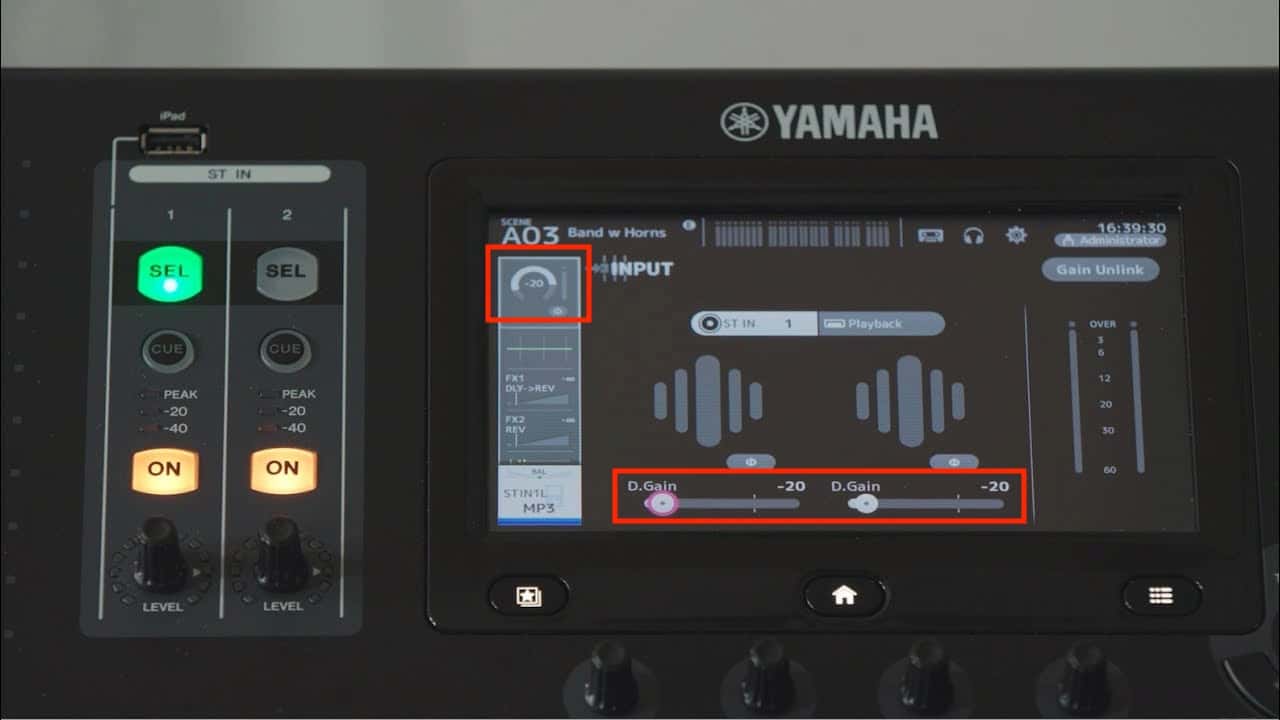
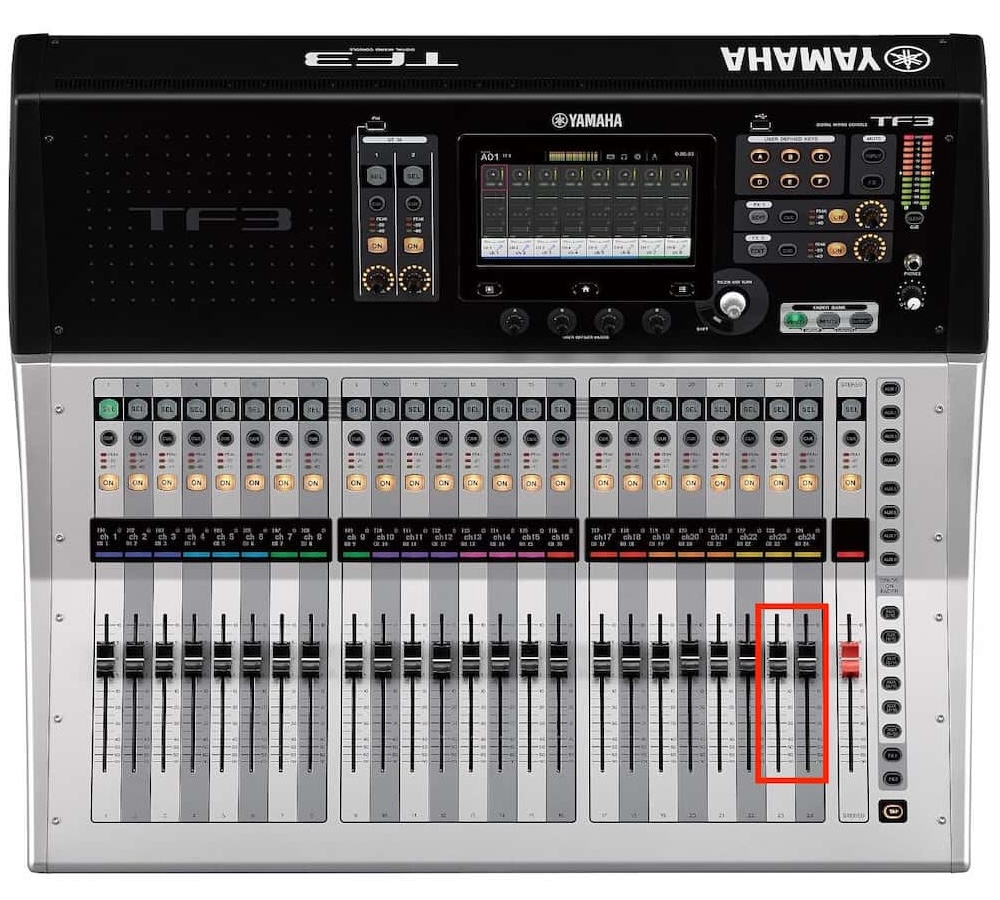
Then slowly turn UP the faders of channels 23+24 to check whether sound is coming out.
Power Off:
- Turn DOWN the Stereo Channel Fader to the bottom ( -∞ )(this is the most right one) of YAMAHA TF3 Mixer (this is most important FIRST STEP!)
- Press the ON button on the Stereo Channel so that its indicator light is OFF (Stereo Channel muted).
- Carefully plug out ONLY the cables connected to inputs 23 & 24 from the back of the Mixer.
Press the Release Tab on the connector before pulling out the cable.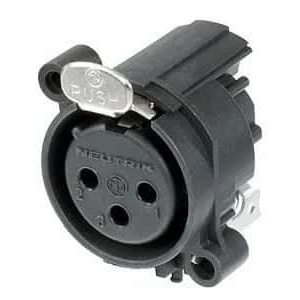
3️⃣ 3rd Setup: Using Microphone
Location: Side of equipment cabinet
Turn on the mixer power and wait about 10 seconds for startup
Long press → Power on/off
Single press → Mute (red light) ↔ Unmute
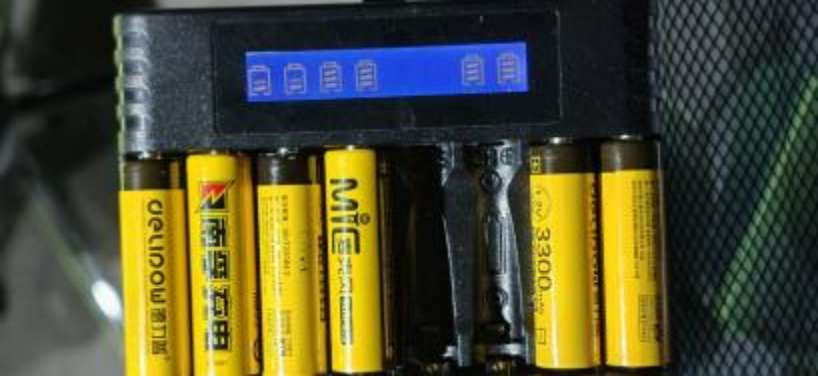
Battery Replacement:
- Twist open the bottom like a flashlight
- Replace with new battery
- Put the used battery back to the charging slot for recharging
❗ Do not leave used batteries on the table
Power Off:
- Long press the microphone button until the light goes off